Showing posts with label Aquarium Technology. Show all posts

2017-12-24

Decorate Your Aquarium With DRIFTWOOD

English: Driftwood
Driftwood (Photo credit: Wikipedia) 
Before you decorate your aquarium with driftwood, there are a couple of things you should know.

When purchasing driftwood, you have to make sure it is safe to use in an aquarium. They sell driftwood for reptiles that may look ideal for aquariums, but it may contain chemicals that can really hurt your fish.

If you happen to find a piece of wood or roots, do not be tempted to use it in your tank. If it has not been properly dried or cured, it can quickly rot.

There is some preparation required before you add driftwood to your aquarium. To make the best of it you need to give it some thought. Using driftwood and other natural objects makes your aquarium look incredible but you have to be careful, since you might cause some stress and might end up having to take the aquarium apart and starting all over if you don't do it right the first time. You can have a beautiful aquascaped fish tank with very little effort if you plan ahead.

To start, draw a rough sketch of the idea you have for your aquarium, think where you want to locate the driftwood, the plants, and any other structures you want to have. Imagine how your aquarium would look with the driftwood positioned vertically, or horizontally. Create many different designs of what your dream aquatic landscape would look like. Of course, if this is a new tank and you don't have any inhabitants yet, you can actually redecorate as much as you want in the dry tank until you are satisfied with the look.

Driftwood needs to be cleaned. Once you've decided where to place the driftwood, use a clean brush to thoroughly scrub the driftwood and remove any dirt or debris it might have. Don't use soap or any other chemicals. Use only water or you risk poisoning the tank. Once you have cleaned the driftwood, you need to cure it and saturate it.

Some driftwood will remain submerged underwater, but some will remain buoyant if it's not fully saturated and "waterlogged." The way to do this is soaking the driftwood in water as long as possible. Make sure you use a bucket large enough for the water to cover the piece completely. You are going to let the driftwood soak from one to two weeks. Be patient. It'll be worth it in the long run. Now, even when you soak your driftwood thoroughly, some large pieces can still retain buoyancy, so secure them to rocks with monofilament (fishing line) to anchor them.

Driftwood contains tannins that can darken and discolor the water, and soak it long enough will draw the excess out and you'll be able to keep your water cleaner. Although the tannins cause some discoloration, it will not harm your aquarium inhabitants, but it will lower the pH slightly over time. You might use this to your advantage if you have very hard water. You might want to know, however, that that stained water is great for many brightly colored Tetras like Neons, Cardinals and Bleeding Hearts. So if you decide to keep this species, you only need to lightly soak and scrub the piece or pieces of driftwood before adding them to your aquarium.

If you want clear water, then keep soaking your driftwood, and when the water starts darkening, empty the water and gently rinse the driftwood. Fill the bucket with clean dechlorinated water and continue soaking the driftwood.

Every time you change the water, you'll notice the water is less and less dark. When there's no more significant discoloration for three or four days in a row, you can finally place your driftwood in the tank. Keep in mind that even after curing and soaking the driftwood, it may still release tannins and discolor the water, but filtering your water with activated carbon will clear it right up.

You can also boil the driftwood. Use a large enough stock pot, and the tannins will leach out faster, and the curing process will be shorter. Moreover, boiling sterilizes the driftwood. It kills any algal or fungal spores that could take hold once you introduce the piece into the aquarium. Boil the driftwood for 1-2 hours to sterilize it.


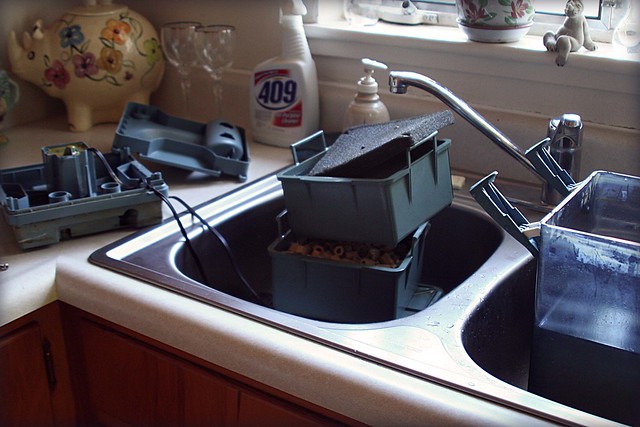
With your driftwood properly prepared, you can now start the decorating process. If you are redecorating an inhabited tank, the best time to do it is during a water change. You only need to place the driftwood into your aquarium and refill it.

There are plants such as Java Moss or Java Fern that can be attached to driftwood to create an aged look. You can secure the plants with monofilament, which can be removed when the plants have naturally attached and grown into the driftwood.

So, patience and some planning are crucial in your new set up, and this is particularly true if you are going to use driftwood as decoration.


2017-12-15

PHOTOGRAPHING FISH: 5 Tips For Frustrated Beginners

post photosafari
Photo  by Céline Martinet 
Photographing pets can often be a difficult proposition. Add water, glass reflections and the low lighting of an aquarium environment, and you've got the recipe for one extremely difficult photo shoot.

But it doesn't have to be that hard. Armed with the following tips, you can get great photos of your fish in just about any situation.

1: Get a tripod.

Tripods are usually used for non-moving subjects. But they can be immensely helpful when photographing fish, even ones that are constantly moving. Low light levels lead to slow shutter speeds. So anything you can do to stabilize the camera will be of tremendous help. The best way to photograph moving fish with your camera on a tripod is to loosen the levers on the tripod so you can move the camera freely left, right, up and down but the camera will remain in position if left alone.

2: Get your fish acquainted with the camera.

Now that you have a tripod (since you faithfully followed the first tip), set it up in front of your aquarium with the camera mounted on the tripod. Now leave it. For as long as possible... several days would be ideal. The purpose of this exercise is to get the fish used to see the "thing" you're constantly moving around, pointing it at them and making noises. When they're comfortable with the sight of the camera, they'll be more relaxed and less prone to dart around the tank or hide.

3: Use a digital camera.

Digital cameras allow us to "just take the picture" without worrying about whether we're wasting the film and processing money on a shot that won't be good. When you can focus on getting the best shot possible, no matter how many tries it takes, you're on the right track to get the shot you want.

4: Turn off the lights in the room.

Ambient light causes reflections on the tank glass that may ruin a perfectly good fish photograph. Eliminate all sources of ambient light that you can, and be very aware of any reflections as you shoot. If there are some reflections you can't get rid of, try putting your body between the light source and the glass to shield the tank from the light.

5: Clean the glass, cut the pumps.

Turning off the aquarium pumps before you shoot is an excellent way to clean up your shots of particles and bubbles in the water column. and if you happen to have a planted freshwater tank or reef aquarium, this will also prevent the plants or corals from swaying in your picture, turning into a blurry mess.


Cleaning the glass is probably the most overlooked step to aquarium photography, and quite possible is responsible for more ruined photos than any other issue. Remember, just because you don't see it now, doesn't mean you won't see it in the picture. Amazing how that happens. So clean the glass well, every time, before you pick up the camera.

6: A Bonus!

Have fun. Aquarium photography can become an interesting and challenging hobby all its own. Have fun with it, experiment freely, and be sure to share your pictures online!


2017-12-01

Tips On AQUARIUM MAINTENANCE

December 22 - 31, 2010
Aquarium Cleaning - Photo   by osseous 
It is easy to maintain your aquarium clean even without the help of experts. With the help of the tips discussed below on easy ways for aquarium maintenance (Dayton, OH), you do not require more than three hours to accomplish the task. This will not only make your fish tank look beautiful, but increase its lifespan. Do weekly water changes as recommended.

Do not make a mistake of feeding your fish on too much food as well as too often. Any excess feed will pollute the pond due to decomposition. The rule of the thumb is put a quantity that will ideally be consumed right away. In addition, you need to purchase appropriate feed for the fish and follow instructions on feeding.

Ensure you maintain an optimum amount of light intensity for the fish to survive. Therefore, do not allow excessive light intensity in the aquarium. This is because an excessive amount of light will stimulate the growth of algae. Too many algae will then decompose depriving fish of oxygen. Hence, you need 6 hours of light a day.

When cleaning the fish tank, remove 10-15 % of water and replace it with fresh tap water. The easiest way is to siphon water from a bucket into the tank. This will avoid spilling the water and messing up decorations and gravel. Fill the tank by placing the bucket full of water higher up and let the water flow by gravity into the fish tank. Do not fill the aquarium. Leave some space for the exchange of oxygen.

Remove undesirable phytoplankton. If you have any algae growing on the surface of the fish tank, use a scraper to remove on the glass before replacing the water. You may decide to use catfish to reduce the number of algae. However, keep in mind that catfish will not clear all the water plants apart from increasing more workload for your maintenance.

Check the temperature every day. It is critical to remember that saltwater fish live in a relatively narrow temperature range. A specialized heater bought at a pet store is used to raise the temperature. You need to maintain an optimum temperature in your pond. Therefore, get into the habit of checking the temperature of the aquarium regularly. This will prevent deaths that may result from the ecosystem due to extreme temperatures that are either too high or too low.


Where you have an unused aquarium, before use, rinse the tank with clean, warm, fresh water. Where there is grime build up on the glass using a mild detergent to clean. You may also use a window cleaner. However, ensure you rinse the tank thoroughly until all the soap is removed. This is because soap residues are harmful to fish and bacteria that is needed to keep the pond healthy and balanced by nitrification.

Cleaning your fish tank is easy and may not take a lot of time. Do not remove all the plants and decorations out of the fish tank. This will not only create extra work but will kill any beneficial bacteria, reducing the quality of your filtration. Remember the bacteria found in the pond forms part of the natural biological filter.

    About the Author: Lelia Hall


2017-10-11

Testing the Hardness of Your AQUARIUM WATER

Česky: Pitná voda - kohoutek Español: Agua potable
(Photo credit: Wikipedia)
As the ecosystem in nature is very fragile and prone to triggering severe consequences if the balance of elements is altered so is the ecosystem inside of an aquarium a very fragile thing, leading to devastating consequences if the balance is thrown off. Because of this it is important that the elements of the water be tested on a regular basis and necessary alterations made as frequently as possible.

There are many elements which are important for the well being of your aquarium fish; temperature and pH have the greatest immediate impact on their well being and should be monitored closely. There are certain precursors which can be tested in order to anticipate problems with these elements, and by closely monitoring these precursors an attentive owner can prevent the death of their fish in much the same way that an attentive physician may be able to head off the formation of cancer.

The carbonate hardness, or kh, level of the water should be monitored closely using one of the commercial systems which are available on the market. These can be purchased from any saltwater fish dealer or through an online retailer such as Amazon.com. The hardness of the water is significant because it can lead to rapid swings in pH. These swings can cause the fish to become stressed, making them more vulnerable to disease than they would be otherwise. This means that it will take very little to make them ill; the germs from the fingers of human hands could be enough to cause an epidemic and wipe out your entire aquarium population. Remember what smallpox did to the Indian populations because their immune systems were not prepared? The consequences could be just as fatal.

Fish will generally adapt to the hardness of the local water supply fairly quickly; however, to truly thrive their environment should be as close to that of their natural habitat (i.e. where they would be living if they were not living in a tank in your home) as possible. This is particularly necessary if you are entertaining the notion of breeding your fish-bear in mind that much like human newborns baby fish will not have had a chance to adapt to an environment that was not suited for them, and many may die because of this. Organic water plants will also thrive best in water that closely resembles their natural habitat. There are many commercial products available which will help to soften the water if the kh level is too high.


By carefully monitoring the kh levels of your aquarium you will be able to stay one step ahead of the elements and help to ensure that your fish have the best chance of survival possible.


2017-09-28

FRESHWATER AQUARIUM History and You

n5_w1150

Photo Flickr -  n5_w1150 (cc)
The history of the freshwater aquarium and aquariums, in general, are varied depending on who you speak to. What is important today is how aquariums evolved and what they have evolved into. Also, the fact that aquariums do have a history, and it is rather interesting. From ancient Mesopotamia to modern-day Miami, aquariums have been apart of human life and have been written about by countless people who for one thing, liked their entertainment appeal as well as the reported soothing effects on the king and queen of ancient times.

The many ancient drawings, carvings, and pictures of aquariums from places in antiquity like Eqypt and Sumeria show us that these past peoples knew the beauty of the tanks and they also desired to maintain that beauty and pass on the secrets of these creatures. The ancient Romans were also known to have traded live fish as commodities in their agoras (markets).

Goldfish and Koi fish

In another part of the world, the art of selective breeding began in China around 2,000 years ago. They had been known to produce the now-famous goldfish developed from the regular carp. By the 18th century, goldfish as an ornamental fish was common in Europe and later became popular in America.

Cultured live koi – that familiar fish with the red, white and black coloration, was already a commercial item in the old trade routes that spanned China, Japan, and Europe around the 16th century. Later, its reputation also grew and became very popular. Much later, it was also exported to Europe and America.

Crude Beginnings
In the early 19th century, aquarium-keeping began. England, Germany, and France all vied to top themselves in mounting exhibits of public aquariums. It did not get a good reception as many were appalled by it.

At that time, there was very poor understanding yet on the various roles of water chemistry, the nitrogen cycle, filtration, and aeration. The size of the tanks was also limited by the holding power of the construction materials then.


The First Aquarium
In 1850, a Mr. Harrington declared through a paper he wrote for the Chemical Society of London that he had successfully maintained a stable aquarium. Fish-keeping suddenly became a popular hobby.

Three years after, many Zoo’s and farms began to open the first public aquariums one after another when they noticed a good turnout. Soon, public aquaria were all over the major European cities patronized by eager but intrigued visitors.

Household Items
It was not long after when the aquarium became a fashionable household item in Victorian England. Curiously, there were no tanks for sale then, although there were various books and other how-to manuals already available for constructing aquariums.

The first constructed tanks leaned more to the ornamental side rather than being functional at best. Most early designs featured a glass front and three wooden sides (They were sometimes constructed from slate). They were coated in pitch to make them watertight.

Tank Basics
Soon, these construction problems were overcome little by little. There was a real breakthrough with the development of silicone sealants.

It became possible now to manufacture an all-glass aquarium in all sizes and shapes. Bulky steel frames became obsolete and tanks can now be moved without the danger of breaking the seal.

Understanding Technology
At around this time, a better understanding of the needs of the tank’s fish inhabitants led to the invention of the heater and the thermostat, as postulated by a Mr. Humphreys. In maintaining fish, this person would be the one to mention the significance of the tanks chemistry toward the safety of the fish.

With a deeper understanding of water chemistry and other related matters, filtration and lighting were soon recognized as additional important elements to the total upkeep of the fish in the aquarium.

The Modern Aquarium
Today’s modern aquariums are made mostly of glass. Nowadays, more tanks are being made from acrylic instead of glass because it doesn’t break as easily. This is because acrylic is pliable and can be used to manufacture unusual shapes. (Acrylic aquariums are mostly used in big showrooms in business and office buildings today.)

Nowadays, aquaria made of acrylics are regarded as the lightweight alternatives to those made of glass. This is especially true now that manufacturers had produced harder and scratch-resistant plastics. Perhaps, they would replace the unwieldy glass in the future.

n222_w1150

Improved Technology

Also, there had been such long strides made in the improvement of the accompanying technology related to aquarium keeping: heating, lighting, filtration, and aeration among others.

Apart from the technology, there is now a better understanding of marine life and ecology that pushed the hobby into what it is today. Taking together both marine and freshwater aquarium varieties, the simple hobby of keeping a living fish in a bowl had become the world’s 2nd most popular hobby. (Gardening is number one.)

The Future Of The Aquarium

There is now a growing number of fish varieties available for keeping in aquariums and the size and shape of aquarium tanks have evolved, too.

However, according to experts, the future of the hobby is still focused on the next advances in water purification, nutrition, lighting and other related matters. Fish breeding is an old and popular practice that has become quite popular around the world with good breeds being created constantly. (Genetic manipulation is still frowned upon.)

Whatever direction the hobby is moving into, today’s hobbyists are reminded that they are part of a thousand-year-old freshwater aquarium history as they tinker their aquariums and feed their aquatic pets.


By Bob Finklea - Article Source: EzineArticles


2017-09-09

Brighten Up Your Aquarium With Attractive AQUARIUM BACKGROUNDS

Aquarium owners enjoy the luxury of keeping fish and other underwater pets for pleasure. Since a properly maintained and presentable aquarium can entail investment, the fish lover is keen on perfectly displaying and enhancing the appearance of his pet. Animals and fish look best in their natural habitat. The environment of their natural habitat can be recreated within the aquarium by using aquarium backgrounds.

These backgrounds are available in various shapes, sizes, and colors depicting underwater natural scenes. They are made of materials which are not harmful to the fish and can be placed inside the aquarium or outside.

Benefits of having Aquarium Backgrounds

The backgrounds have several practical and aesthetic benefits. They are attractive decorative items that enhance the overall appearance of the aquarium by increasing its depth. By concealing the cable, tubes, and cords that clutter the back of the fish tank, they present a neat and natural look to the aquarium.

Inside an aquarium, algae build up rapidly in presence of sunlight. In bright rooms, the presence of background reduces direct sunlight resulting in control of algae.


Options for Choice of Aquarium Backgrounds

· First it is important to consider the size of the tank. Aquariums of smaller size will require backgrounds that do not occupy too much space inside the tank. Positioning decorative objects in the fish tank will encroach upon the space that is important for the fish.

  • On the lower price range, you can buy colorful aquarium background sticking labels that can be pasted externally at the back of the aquarium tank. These stickers or labels are available in different designs, portraying floral life and rocks. This is a perfect choice for those who cannot invest time for mounting a background for the aquarium. But if you are using internal backgrounds, which are higher on price, make sure that the material and paints used inside the fish tank are not harmful to the fish. Aquariums are delicate settings and can be easily polluted.

  • The next option is the three-dimensional aquarium backgrounds, which are cast into different shapes. They are made out of plastic, fiberglass or Styrofoam. Styrofoam and plastic backgrounds are suitable for small tanks, but the large saltwater aquariums use fiberglass backgrounds. Both the plastic and styrofoam backgrounds can also be cut into shapes for using them on other backgrounds of different sizes.

  • Fiberglass backgrounds are widely used in zoological displays and public aquariums. Fish lovers who own large saltwater fish tanks can buy tailor-made fiberglass backgrounds which will present a real look of underwater scenes. These backgrounds are fixed internally at the backside of the fish tank with aquarium silicone. This silicone is made especially for use in the aquarium.
As per Feng Shui principles, the presence of an aquarium can bring peace at home. It is also true that when we gaze at fish in an aquarium, it brings a feeling of calmness. Moreover, displaying aquariums with attractive backgrounds add up to the beauty of the aquarium. So, whichever option you choose for creating aquarium backgrounds, you will be definitely spending quality time and money on your favorite asset in your home.


By Darren G Lawes Darren Lawes is a freshwater aquarium enthusiast.
Article Source: EzineArticles


2017-09-02

AQUARIUM PLANTS And LIGHTNING Mini-guide

Aquarium plants are as important to aquariums as water is to fish. Aquarium plants add more life to aquarium and make it to look beautiful while completing the aquarium community structure. 

The most important thing to bear in mind with plants is to form an attractive background, leaving ample space so the fish can swim undisturbed and be seen. The tall, grassy type is best planted at intervals in rows, while the feathery ones look better when they are bunched into small clumps, which makes them to appear like branching bushes. 

aquarium
Aquarium (Photo credit: Wikipedia)

When planting rooted plants, hold the tips of the bunch of roots between the thumb and second finger and rest them on the sand. Now with the first finger push the upper part of the roots (where they join the stem) about 2cm into the sand. Without moving this finger scrape with the thumb and second finger some sand over any uncovered portion of the root. 

When putting in rootless plants in bunches, the method explained above is repeated, but this time the lower ends of the stems are placed together and treated exactly as if they were roots. 

It is important that the water surface should be right up to the lower edge of the top angle iron of the tank, so that looking from the front the water surface can not be seen and the viewer gets the impression that there is no water in the aquarium. If the level is allowed to fall below the top angle iron the tank looks like a container holding water. 

Aquarium Lighting is also important for aquarium plants 

This depends greatly on whether you intend to successfully grow plants or not. Lack of light causes colorful fish to fade and clanch-reds to pink, green to white. The two main methods of lighting aquarium are by the INCADESCENT and FLOURESCENT. 

The total amount of light required is a matter of trial and error. Too much light will turn the water green; too little will stunt plant growth. 

The lighting can be natural or artificial or a combination of both. The best position is near a north facing window. This should provide the ideal amount of indirect lights which an be supplemented by artificial light. 


The lighting should be housed in wood constructed stylishly with the furniture and placed above the tank. if there is no natural day light, the lights should be left on for approximately eight hours per day. 

If the water turns green, you cut down on the light. 

The best light for showing off an aquarium comes from behind.


2017-08-31

Testing the HARDNESS of Your Aquarium Water

As the ecosystem in nature is very fragile and prone to triggering severe consequences if the balance of elements is altered so is the ecosystem inside of an aquarium a very fragile thing, leading to devastating consequences if the balance is thrown off. Because of this, it is important that the elements of the water be tested on a regular basis and necessary alterations made as frequently as possible.

Photo: Wikipedia (CC)

There are many elements which are important for the well being of your aquarium fish; temperature and pH have the greatest immediate impact on their well being and should be monitored closely. There are certain precursors which can be tested in order to anticipate problems with these elements, and by closely monitoring these precursors an attentive owner can prevent the death of their fish in much the same way that an attentive physician may be able to head off the formation of cancer.
     
The carbonate hardness, or kh, level of the water should be monitored closely using one of the commercial systems which are available on the market. These can be purchased from any saltwater fish dealer or through an online retailer such as Amazon.com. The hardness of the water is significant because it can lead to rapid swings in pH. These swings can cause the fish to become stressed, making them more vulnerable to disease than they would be otherwise. This means that it will take very little to make them ill; the germs from the fingers of human hands could be enough to cause an epidemic and wipe out your entire aquarium population. Remember what smallpox did to the Indian populations because their immune systems were not prepared? The consequences could be just as fatal.


Fish will generally adapt to the hardness of the local water supply fairly quickly; however, to truly thrive their environment should be as close to that of their natural habitat (i.e. where they would be living if they were not living in a tank in your home) as possible. This is particularly necessary if you are entertaining the notion of breeding your fish-bear in mind that much like human newborns baby fish will not have had a chance to adapt to an environment that was not suited for them, and many may die because of this. Organic water plants will also thrive best in water that closely resembles their natural habitat. There are many commercial products available which will help to soften the water if the kh level is too high.
     
By carefully monitoring the kh levels of your aquarium you will be able to stay one step ahead of the elements and help to ensure that your fish have the best chance of survival possible.


2017-08-29

ACRYLIC AQUARIUMS Vs Glass What Are The Benefits

Technology, the result of creative innovations, constantly changes our lives. Each technological advancement increases the significance of our choices. Conventional products now compete with new and improved varieties. Versatility, design, and product enhancements provide consumers with more choices than ever. Hobbyists are taking note. For example, advancements in aquarium production now expand beyond the traditional glass structure, opening a whole new world to aquarium enthusiasts.

English: Photo by Angela Grider. A diver clean...
A diver cleaning acrylic at the Georgia Aquarium.
(Photo credit: 
Wikipedia)

Traditionally glass tanks were manufactured using silicon sealant. Due to construction constraints sizeable aquariums were generally rectangular. Size and shape variations are difficult to achieve with glass panels. Cracking and leakage concerns hampered customization of glass aquariums also. However glass was the original material for a reason, it was the best available choice.

Nowadays acrylic is pushing glass out of the lead, at least where aquarium enthusiasts are concerned. Simply put consumers demand versatility, acrylic offers versatility and more that glass never could.

Better leak protection, greater strength, superior insulation, lighter weight and incredible pliability prove acrylic is a more advanced material. These strengths allow personalization, customization, and endless possibilities for consumers wishing to add an aquatic factor.

The differences are undeniable, glass tanks require a silicon sealant while acrylic aquariums are molecularly welded. Sealant can age and crack over time, but welding fuses the seams creating a virtually leak-proof barrier. It'll be a long time before technological advancements allow that kind of leak protection from glass.

Acrylic is also seventeen times stronger than glass and it's more flexible. Strength is important for preservation, protection and impact resistance. Flexibility dramatically increases design versatility. Unlike glass, acrylics can be manipulated into various shapes. For example, acrylic aquariums can have flawlessly rounded corners glass aquariums cannot.

Additionally acrylic aquariums are 20% better insulated than glass aquariums. Thus acrylic aquariums require less energy for maintenance. Enhanced insulation regulates temperatures making equilibrium easier to achieve for a variety of fish and plant life.

Perhaps consumers are wondering if transparency is affected by the increased insulation and strength of acrylic. All these benefits would not be worth a hazy view. Actually, transparency has not been compromised. Acrylic aquariums boast a 93% transparency rating, which is as clear as optical glass. Acrylics reportedly pass the most light of any known material; glass aquarium panels often inhibit light transmission.


Better insulation and strength don't comprise weight either. Acrylic aquariums weigh in 50% lighter than comparable glass aquariums. Therefore, transporting a customizable acrylic aquarium requires less effort, energy and support.

Acrylic aquariums are impressive. Their overwhelming advantages put glass aquariums on the endangered list. As a confirmation of acrylic advantages virtually all modern public aquariums are built using acrylic. The greater ability to customize size and shape are a major attraction, while leak and equilibrium protection make acrylic better for hard to keep species. Now you know the advantages of acrylic over glass, it's time to put that information to use by designing your very own custom aquarium.


2017-08-22

AQUARIUM FILTERS - The Pros and Cons of Each Filter

Having a good aquarium filter can make the difference between enjoying fish-keeping or not. Here are descriptions of the different kinds of aquarium filters available, what kind of tanks they are best for, and the overall pros and cons of each option.

My Afternoon
My Afternoon - Photo by armigeress 

Corner filters

These small clear plastic box filters have an airstone that pushes water up through layers of floss and charcoal. The box sits in the gravel in a corner of the tank. Sometimes they need to be weighted down to keep them from floating. They are very cheap, but not terribly efficient. While they do add some aeration to a tank, you are not going to clean up a dirty tank with this kind of filter.

Sponge filters

These are similar to corner filter, but there is no floss or charcoal or even a plastic box -- all filtering is done through a sponge. Again, this is not a very efficient filter, but it does help. Sponge filters are used in fry and quarantine tanks because they create no strong currents, and they do clean up a tank a bit, and they provide some aeration. Fry may also enjoy nibbling algae off the sponge.


Undergravel filters

Undergravel may be the best choice for a standard community tank. You can also combine an undergravel filter with an exterior box filter for some extra clean water. The benefits are that undergravel filters are relatively cheap, they do a good job once they are established, and they do not create strong currents that some fish, like bettas or discus, will not like. These filters use biological and mechanical filtration by pulling the dirty water in the tank down through the gravel. The plastic aisles of the undergravel filter hold the gravel up so there is a small space at the bottom of the tank. This is where most of the debris is captured. The clean water is pushed up through two tubes on either side of the back of the aquarium and pushes the clean water out -- fairly gently -- through two window-shaped grates.

Undergravel filters use your aquarium's gravel as the filtration media. While there is mechanical filtration, most of the action is happening via biological filtration in the gravel. So these filters may take a few days to show you clean water. There's also no way to upgrade them aside from adding a powerhead, which is only going to add more pull. You will also need an air pump to run an undergravel filter. The stronger it is, the more filtration you will get.

External/hang on the side filters

These filters are boxes that do most of their work just outside of the tank. They hang on the side with an uptake tube that goes down into the tank. The dirty water is pulled up the intake tube and pushed through a series of sponges and usually a bag of activated carbon. This performs biological, mechanical and chemical filtration. The clean water is pushed out through a trough formation that spills into the tank.


These kinds of filters do create a bit of current, especially if you have got a large tank. They can handle tanks up to 100 gallons, and if you had a larger tank than that (lucky you) you could just add a second filter. These kinds of filters have to be cleaned about every week to two weeks by squeezing out the sponges until all the trapped particles are released. Sometimes small fish get caught or pulled up by the intake tube, but this only happens with very, very small fish. That said, do not use these kinds of filters in a fry tank. Otherwise, they do a pretty good job and are a very good filter for the money. They run about $20 for a 20-gallon tank. "Trickle" filters are similar technology.

Canister filters

These are the "big dogs" of the filter world. Unless you have a community tank that is over 50 gallons, using a canister filter is a bit like swatting a fly with a cannonball. The benefit to canister filters is that they do a very, very good job and you do not have to clean them more than once a month if that.

Some people "cheat" and buy canister filters made for tanks two or three or even four times the size of their aquarium and then (sometimes) they can get away with cleaning the filter less than once a year. If you have lots of extra money, but very little extra time, this is a viable trick for those of us who hate cleaning the fish tank (you still have to do water changes, though). The downside is that cleaning canister filters is a big deal and they are quite expensive ($75 to $300).

    Pamella Neely writes about betta fish care and betta fish tanks.

    Article Directory: EzineArticles


2017-08-14

Know Your PROTEIN SKIMMER Before You Buy It

Photo: Wikimedia
1. The protein skimmer can remove the organic wastes almost as soon as they are formed in your aquarium. That means you are able to eliminate them before they are disintegrated by the bacteria in the tank into a nitrogenous matter. Nitrogen in the tank can be harmful, as it will interfere with the properties of the water and even get converted into toxic forms that could be life-threatening to the inhabitants of the aquarium.

2. If you are continuously removing the organic protein wastes from the aquarium with the skimmer, it is obvious that the aquarium will not require frequent water changes.

3. Apart from the protein wastes, the protein skimmers are also capable of removing fatty substances that collect in the tank and some carbohydrates. Even organic molecules containing elements like copper can be eliminated.

How do you choose a Protein Skimmer for your Aquarium? But, though a protein skimmer is a very essential device, it is also one of the most expensive additions that you will make to your aquarium. That is the reason why you should buy the most suitable skimmer, as it will be a one-time expense you will make. A good protein skimmer will also be durable and will be with you for a long time.

Here are the different types of protein skimmers that are available in the market. You can decide what to buy after understanding the types available.

1. Co-current Protein Skimmers – Co-current protein skimmers are called so because here the water from the aquarium is made to move only in one direction (upwards), and the bubbles move along with the flow of the water. The exchange of wastes is done between the water and the bubbles as both moves towards the top, side by side.

2. Counter Current Protein Skimmers – In counter current protein skimmers, the bubbles move downwards for a while as the water moves in the upward direction. The bubbles move downwards for some time, till the exchange takes place and then they take the waste matter to the cup on the top. The advantage is that the counter current mechanism facilitates for better contact between the dirty water and the bubbles and hence more effectiveness.


3. Circulating Current Protein Skimmers – These are a new development, in which the mechanism is the same, but the water is made to enter into the protein skimmer a number of times through a circulating device. This increases the time of contact and ensures a high degree of purification of the water.

Your choice of a protein skimmer will certainly depend upon the type of aquarium and the budget. The co-current protein skimmers are the cheapest, and they are quite effective for small size freshwater and saltwater aquariums. Prices are high for the counter current variety, and the circulating ones are the costliest. But it you have a very large aquarium, like the ones they keep in commercial places, you will need a powerful protein skimmer. In such cases, counter current and circulating current protein skimmers become essential.


2017-07-25

Choosing the Right SUBSTRATE For Your Aquarium

The effects of choosing a bad substrate are not as obvious as bad Co2, lighting or heating choices for your plants, but the long-term effects can be devastating. Changing a substrate in an established aquarium is one of the hardest procedures you can undertake.

240 litres aquarium with different fishes, pla...

240 litres aquarium with different fishes, plants and a big root. Species = Fishes: Pterophyllum scalare, Trichogaster leeri, Paracheirodon axelrodi, Macropodus opercularis, Ancistrus sp.. Aquatic plants: Echinodorus, Anubias barteri var. nana, Hygrophyla difformis, Microsorum pteropus 'Windeløv, Micranthemum micranthemoides, Vallisneria sp, Echinodorus tenellus, etc.
(Photo credit: 
Wikipedia)

Substrate is a source of nutrients for your plants and secondly serves to hold whichever plants you would like to keep in place. At the very least you will want to choose a substrate which is rich in the macronutrients that your aquarium will need. A deficiency of macronutrients results in many unwanted physical effects in your plants, ranging from discolouration and dis figuration, to browning and death. Needless to say, it is important that your plants have all the nutrients that they require. Although it is possible to supplement some of them via fertilizers, this can introduce water chemistry issues of its own.

When choosing a substrate, try to establish what macronutrients that it contains. It is helpful to make sure that your chosen substrate is intended for your kind of aquarium. If you were to choose a substrate that was designed for salt water aquarium use, you run the risk of releasing unwanted slats or minerals into the water. In the case of crushed coral, this may raise the pH of the water to an unwanted level and the potential knock-on affects of this can be deadly.

One of the best ways to work out what would be good for your aquarium is by locating the hobbyists themselves. Forums are often priceless in helping you find exactly the right combination of materials to make your own substrate. You will also find recommendations for commercially available substrate for your aquarium, be it tropical, freshwater, marine or salt. It is always worth taking forum recommendations with a pinch of salt, unless a full overview of all the macronutrients and general use of the substrate is given. Some examples of good major brands of substrates would be Fluorite, Eco Complete and ADA Aquasoil. Before you buy anything, read the manufacturers packaging carefully.


When choosing your substrate, try to provide a substrate of three to eight millimetres per grain. Too much is as bad as too little; with too little the roots will be suffocated and with too much, there is not enough contact with the roots. You will need to do your research, with the kind of aquarium you keep in mind to find the best thing for your plants and fish.

With live aquarium plants you can overcome all the problems of a non-planted aquarium. You can improve the quality of your aeration, filtration, food and algae control. You can improve the lives of your fish.

Find out how live aquarium plants can help you, help them.

    By Sean Norman
    Sean Norman is an environmental science student and freelance writer with a deep love of ecology.
    Article Source: EzineArticles


2017-07-22

Saltwater Aquariums With No UV STERILIZER Equals Certain Troubles

I am shocked and surprised how often I come across marine aquariums (reef or fish only) that have no U.V. sterilizer filter. These aquarists are playing Russian roulette with their aquariums, running the risk of being vulnerable to a parasite outbreak.

A low pressure mercury vapor discharge tube fl...
A low pressure mercury vapor discharge tube floods the inside of a hood with shortwave UV light when not in use, sterilizing microbiological contaminants from irradiated surfaces.
(Photo credit: 
Wikipedia)

There are many different situations that can cause a disease and/or parasite outbreak in your marine aquarium. It could be adding new fish, or perhaps one of your fish changes sex and throws off the entire pecking order, or a fish dies or is removed and that throws off the pecking order; or say your chiller (if you have one) went on the fritz during a heat wave - and the list goes on.

And given that there are so many situations that could spark a disease or parasite outbreak, wouldn't you want to protect yourself (and your fish) against this likely possibility? Who wouldn't? And yet many aquarists don't have a U.V. sterilizer on their system. It's like rolling the dice and crossing your fingers, hoping you don't have a disease outbreak.

So, before I go any further, let me just say that - yes - you definitely need a U.V. sterilizer. That is, if you want your fish to live for years rather than months, and if you want to avoid even the possibility of a total system meltdown (scary scientific term). Yes, this is my opinion, but it is also backed up with over 11 years in keeping saltwater fish (primarily reef tanks) with only three disease outbreaks - and two of them were caused by human error. By disease outbreak, I mean multiple fish dying from parasite infestation. This is attributed to aggressive use of U.V. sterilizer filters. And don't forget, I'm not talking about just one tank. I run a high-end custom aquarium design, installation and maintenance business, where we service many customers with large saltwater aquariums.

So, yes, it's a bold statement. And it also happens to be true. See - I don't like problems or surprises when it comes to aquariums. Over the years of running my business, I have had to develop ways of preventing problems from even being able to happen on our customer's tanks; and then having designed the system to be prepared to accommodate the problem if it ever does happen. This is sort of our company philosophy to aquarium system design and it is a preventative approach designed to prevent problems - so that we put far less energy into reacting to and fixing problems. Any way - enough of that. Back to U.V. sterilization.

By now, you might be thinking "yeah right - I don't believe you". Well, I'm not saying that we've only seen parasites on some of our fish three times in 11 years. NOPE. We see low-levels of parasites on fish fairly often - but those fish are thriving and healthy and live long lives - typically for over five years, and are able to fight off the parasites. AND the parasites are not aloud to bloom to dangerous levels because the U.V. sterilizer kills the parasites when they are water born (verses dormant in the substrate) and looking for a host.

So, what is a U.V. sterilizer filter? The U.V. stands for ultraviolet sterilization. Basically, it contains a special light bulb which emits U.V. "C" light. U.V. "C" is the band of U.V. light that gives us sun burn. So, essentially, a U.V. sterilizer filter is "sun-burning-to-death" (scientific term) or sterilizing your aquarium water as it passes through the filter, and thus killing any water-born parasites. It runs 24/7 and is very cheap to operate and can PREVENT parasite outbreaks. What aquarist wouldn't want to be able to prevent a parasite outbreak? This is why having a U.V. is a no brainer MUST HAVE filter for your aquarium.

In addition, the U.V. filter will prevent bacteria blooms (caused by water-born bacteria - milky or cloudy water) and phytoplankton blooms (cause of green water). The result here is clear water. Of course, this doesn't remove the underlying cause of the bacteria bloom (excess organics and insufficient bio-filtration) which must still be dealt with.

Sizing is probably the most important factor when selecting your U.V. sterilizer for your aquarium. My general advice is to slightly oversize your U.V.. Most sizing charts are based on aquarium/system volume. The last thing you want is an undersized U.V., because then it is almost useless (i.e. it is too small to prevent disease outbreaks). Several parameters to consider are system/tank volume, water flow rate through the U.V. filter, and bio-load (how much life is in your tank). So again, when selecting your U.V. sterilizer, choose the next one up in size, as recommended on the sizing chart.

Example: If your aquarium is 100 gallons and the sizing chart recommends a 30watt UV for a 90g and a 40watt UV for a 120g, then go with the 40watt UV.

One of the primary criteria used in sizing a U.V. sterilizer is the water flow rate through the unit. See, if you send too much water (too high of a flow rate) through too small of a unit, then it won't be effective in killing the parasites. But for me (I'm lazy), that is too much work, calculating flow rates, etc., so what I do is take the manufacturers recommended sizing for my aquarium (gallons) and then choose the next larger size U.V.. This almost ensures that your U.V. will be effective in killing water-born parasites in your aquarium and preventing a disease outbreak. And nine times out of ten, if you do the calculations of water flow rate, UV kill rate, and total system volume, you will end up at the same size U.V. any way. One caviat here - this method is based on average bio-loading (average number of fish/invertebrates etc.) for any given tank volume. So if you are crazy aggressive with your stocking density of fish/corals/invertebrates/etc., then you may even want to choose a U.V. that is two sizes up.


Of course, U.V. is not the only effective way to sterilize against disease and parasites. Ozone is very effective if applied and monitored properly. But Ozone is far less forgiving than U.V., and while you cannot CAUSE any problems by over sizing a U.V. filter, you can cause BIG PROBLEMS by improperly applying and monitoring ozone. But more about ozone in future posts. For now, suffice it to say that U.V. is very safe and simple to apply to your aquarium filtration system, and there is no monitoring (unlike ozone).

You do need to ensure proper upkeep or maintenance of your U.V. sterilizer. Once a year, you must change the bulb and the O-ring and/or gasket, and clean off the quartz sleeve (housing the bulb). This may take 30 minutes to an hour to do, but is necessary because after a year of operation, the bulb has begun to lose its potency and the ozone gas produced by some U.V. bulbs will break down the O-ring and/or gaskets that seal off the quartz sleeve. And in some systems the quartz sleeve can accumulate mineral deposits that may reduce effectiveness of the U.V. bulb. A simple overnight vinegar bath and wipe-down with a sponge will do the trick.

Generally, I'm not big on having opinions. I like to be open-minded, and opinions tend to cut us off from being open to learning something new. But when something works as well and as consistently as this does, well, I feel strongly about it. The proof is in the pudding, as they say. I hope this is of help to you.